Easy No-Bake Birthday Cake Oreo Truffles: Your Stress-Free Celebration Treat
Imagine a dessert that captures all the joy and festivity of a birthday cake, but without the fuss of baking. A treat so simple, so delicious, and so incredibly satisfying that it becomes your go-to for every celebration, big or small. Enter the world of oreo birthday cake truffles no bake – a game-changer for anyone who loves sweets but dreads the oven. These delightful bites are not only unbelievably easy to make but also packed with flavor, sprinkles, and that irresistible "birthday cake" magic. Forget complicated recipes and sticky pans; these truffles are designed for a stress-free experience, promising pure indulgence in every bite.
Whether you're celebrating a birthday, an anniversary, a blogiversary, or simply the end of a long week, these no-bake wonders are guaranteed to bring a smile to everyone's face. Their fudgy texture, sweet flavor, and vibrant sprinkle-studded appearance make them an instant crowd-pleaser. Get ready to discover your new favorite hassle-free dessert!
Why No-Bake Birthday Cake Oreo Truffles Are Your New Go-To Treat
In our fast-paced lives, finding time for elaborate culinary creations can be a challenge. That's where the beauty of no-bake Oreo truffles shines. They offer a gourmet taste with minimal effort, making them ideal for busy schedules or impromptu gatherings. Here’s why these truffles are about to become your dessert superhero:
- Effortless Preparation: The clue is in the name – no bake! This means no preheating ovens, no precise baking times, and no worrying about cakes falling flat. All you need is a food processor (or a good old-fashioned zip-top bag and a rolling pin) and a refrigerator.
- Ultimate Convenience: With minimal active prep time, you can whip up a batch in under 30 minutes. The chilling does the rest of the work! This makes them perfect for last-minute party contributions or a quick treat to satisfy a sudden sweet craving.
- Incredibly Versatile: While they scream "birthday," these truffles are suitable for any occasion. Baby showers, holiday parties, potlucks, or even just a cozy night in with a sweet tooth – they fit right in. Their bite-sized nature also makes them perfect for sharing (or not!).
- Customizable Fun: From different Oreo flavors to various toppings and coatings, these truffles are a blank canvas for your creativity. Want to match a party theme? Simply change the sprinkle colors!
- Seriously Delicious & Addictive: We're not exaggerating when we say these are addicting. The rich combination of crushed Oreos, sweet binders, and playful sprinkles creates a textural and flavor explosion that's hard to resist. Good luck eating just one (or two!).
Crafting Your Perfect No-Bake Birthday Cake Oreo Truffles: Two Delicious Approaches
The magic of oreo birthday cake truffles no bake lies in their simplicity, but there are a couple of delightful paths you can take to achieve that perfect fudgy, celebratory bite. Both methods leverage the incredible power of crushed Oreos as their base, but differ slightly in their binder, offering distinct textures and flavor profiles.
Approach 1: The Fudgy & Sweet Condensed Milk Method
This method yields a wonderfully dense, rich, and truly fudgy truffle, reminiscent of a dense blondie. It’s incredibly straightforward and relies on the creamy sweetness of condensed milk to bind everything together.
Ingredients You'll Need:
- Golden Oreos: Approximately 36 cookies (15 oz/400g). For an extra boost of birthday cake flavor, seek out actual Birthday Cake Oreos if you can find them!
- White Chocolate Chips: About 1 cup (or an equivalent amount of white chocolate melts). This adds richness and helps with the fudgy texture.
- Sweetened Condensed Milk: 1/2 to 3/4 can (around 7-10 oz). Adjust to achieve your desired consistency.
- Rainbow Sprinkles: A generous amount for mixing in and topping – the more, the merrier for that classic birthday look!
Simple Steps to Fudgy Perfection:
- Crush Your Oreos: Place the entire package of Golden Oreos (creme filling and all!) into a food processor. Pulse until you have fine, uniform crumbs. Depending on your processor size, you might need to do this in batches. If you don't have a food processor, a sturdy zip-top bag and a rolling pin work wonders!
- Melt the White Chocolate: In a microwave-safe bowl, melt the white chocolate chips in 30-second intervals, stirring well after each, until completely smooth and lump-free. Be careful not to overheat it.
- Combine Wet Ingredients: Pour the condensed milk into the melted white chocolate and stir until thoroughly combined. This creates a sweet, binding mixture.
- Mix it All Together: Add your crushed Oreo crumbs to a large mixing bowl. Pour the white chocolate and condensed milk mixture over the crumbs. Now, add a generous handful of rainbow sprinkles. Stir everything together with a sturdy spatula until a thick, uniform dough forms. It should be moist enough to hold together when pressed.
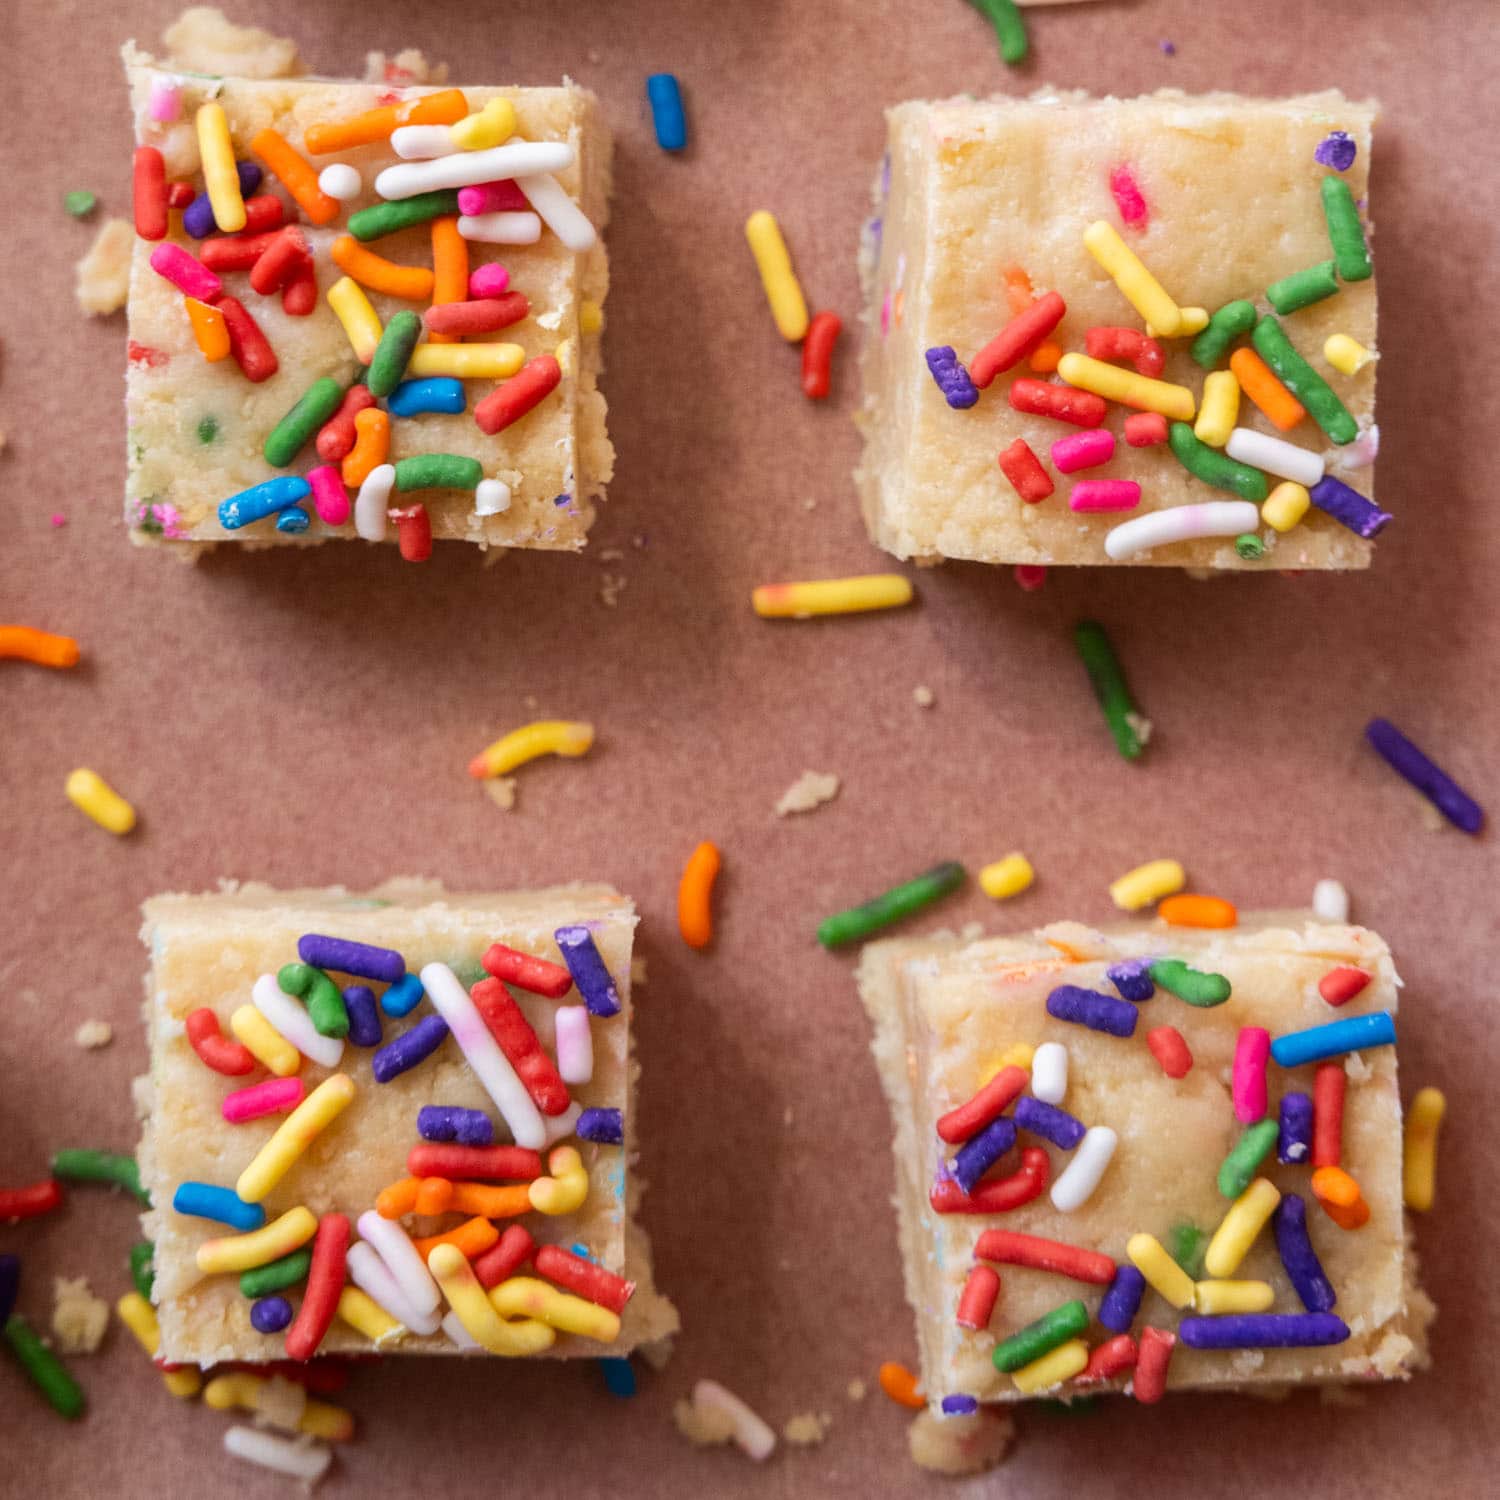
- Press and Chill: Firmly press the mixture into a parchment-lined 8x8 or 9x9 inch baking pan, using the back of your spatula or your hands to create an even, smooth layer. Sprinkle more rainbow sprinkles generously over the top, gently patting them down so they adhere.
- Refrigerate: Place the pan in the refrigerator for at least 2 hours, or until the mixture is firm enough to cut easily.
- Slice and Serve: Once firm, lift the parchment paper to remove the slab from the pan. Cut into small, bite-sized squares. Share (if you can resist eating them all yourself!) and enjoy!
For more detailed tips on achieving that perfect fudgy texture, explore our guide on Fudgy Golden Oreo Truffles: Your Ultimate No-Bake Birthday Bite.
Approach 2: The Creamy & Rich Cream Cheese Method
This variation offers a slightly tangy, incredibly rich, and velvety interior, often rolled into balls and sometimes dipped in chocolate for an extra layer of decadence. If you love a classic truffle texture, this one's for you.
Ingredients You'll Need:
- Golden Oreos: About 36 cookies (15 oz/400g), or Birthday Cake Oreos for amplified flavor.
- Cream Cheese: 8 oz (225g), softened at room temperature. This is crucial for a smooth mix.
- Rainbow Sprinkles: For mixing in and decorating.
- Optional for Coating: 12 oz white chocolate buttons, chips, or candy melts (e.g., birthday cake flavored candy wafers for extra "birthday-y" flair), plus 1 tablespoon vegetable oil for thinning.
How to Make Creamy Truffle Balls:
- Crumble Oreos: Process the Oreos (with their creme centers) into fine crumbs using a food processor.
- Combine with Cream Cheese: Add the softened cream cheese to the Oreo crumbs in the food processor. Pulse until the mixture is well combined and smooth, forming a cohesive dough. Scrape down the sides as needed.
- Fold in Sprinkles: Transfer the mixture to a bowl and fold in a good amount of rainbow sprinkles using a spatula.
- Roll into Balls: Scoop out tablespoon-sized portions of the mixture and roll them into neat balls. Place these on a parchment paper-lined baking sheet.
- Chill Thoroughly: Refrigerate the balls for at least 30-60 minutes, or until firm. This makes them easier to dip if you choose to.
- Optional Dipping (for extra wow!):
- Melt your white chocolate or candy wafers according to package directions. If using plain white chocolate, add a tablespoon of vegetable oil to thin it slightly for easier dipping and a smoother finish.
- Dip each chilled truffle ball into the melted chocolate, coating it completely. Use a fork or a dipping tool to gently tap off excess chocolate.
- Immediately place the dipped truffle back on the parchment paper and top with more sprinkles before the chocolate sets.
- Final Chill: Return the truffles to the refrigerator for another 15-30 minutes to allow the chocolate coating to set.
Choosing Your Oreo Base: Beyond Golden
While Golden Oreos provide that classic "birthday cake" vanilla flavor, don't limit your creativity! You can absolutely use:
- Birthday Cake Oreos: These are a fantastic choice, as they already have sprinkles in the creme and a birthday cake flavor, intensifying the theme of your truffles.
- Chocolate Oreos: If you're a chocolate lover, swapping in classic chocolate Oreos will give you a delicious "chocolate cake batter" truffle.
- Other Flavors: Experiment with seasonal or limited-edition Oreo flavors for truly unique truffle creations!
Elevating Your Truffle Game: Toppings, Dipping & Storage Secrets
Once you've mastered the basic oreo birthday cake truffles no bake recipe, it's time to unleash your inner dessert artist. Customizing these treats makes them even more special and perfectly suited to any event.
Dazzling Toppings and Dipping Options
Beyond the sprinkles mixed into the truffle base, consider these ideas for a show-stopping finish:
- Extra Sprinkles: A simple, yet effective way to add more visual appeal. Use classic rainbow, themed sprinkles (e.g., pastels for a baby shower, red/green for holidays), or even edible glitter for extra sparkle. Gently pat them down onto the soft truffle mixture or wet chocolate coating to ensure they stick.
- Chocolate Drizzle: Melt a small amount of white, milk, or dark chocolate and drizzle it decoratively over the chilled truffles. Use contrasting colors for a striking effect.
- Candy Melts: For dipped truffles, candy melts (also known as candy wafers or coating chocolate) come in a vast array of colors and even flavors. As mentioned in the reference, using "birthday cake candy wafers" can give your truffles an extra layer of authentic birthday cake flavor and a smooth, colorful shell. Just melt them according to package directions, perhaps thinning with a touch of coconut oil if needed, and dip your chilled truffle balls.
- Crushed Nuts or Cookies: For added texture, lightly press crushed nuts (like pecans or walnuts) or even more finely crushed Oreos onto the chocolate coating before it sets.
Storage & Freezing Secrets for Future Indulgence
One of the best things about no-bake Oreo truffles is their excellent shelf life, especially when properly stored. This makes them fantastic for make-ahead party prep or having a sweet treat ready whenever a craving strikes.
- Refrigeration: Once cut into squares or rolled into balls, store your truffles in an airtight container in the refrigerator. They will remain fresh and firm for at least 1-2 weeks. Always keep them chilled, as they can soften at room temperature, particularly the cream cheese-based versions.
- Freezing for Long-Term Enjoyment: These truffles freeze beautifully!
- Cut your chilled truffles into individual bite-sized squares or ensure your balls are firm.
- Arrange them in a single layer on a parchment-lined baking sheet and flash-freeze for about 30 minutes, or until solid. This prevents them from sticking together.
- Transfer the frozen truffles to a freezer-safe bag or an airtight container, separating layers with parchment paper if stacking.
- Store in the freezer for up to 2-3 months.
- Enjoying Frozen Truffles: When you're ready for a treat, simply grab one (or a few!) directly from the freezer. You can enjoy them chilled and firm, or let them sit out at room temperature for a few minutes to soften slightly. They thaw surprisingly quickly and maintain their delicious texture.
For more comprehensive advice on freezing and various flavor experiments, be sure to check out Master No-Bake Oreo Truffles: Flavors & Freezing Tips.
Conclusion
The quest for a truly stress-free yet utterly delightful dessert often leads us down complex paths, but with oreo birthday cake truffles no bake, the journey is as sweet and simple as the destination itself. These easy, versatile, and incredibly delicious treats prove that you don't need an oven or hours in the kitchen to create something truly celebratory. Whether you opt for the fudgy condensed milk version or the creamy cream cheese delight, you're guaranteed a dessert that's packed with fun, flavor, and sprinkles. So go ahead, gather your ingredients, enlist your food processor, and get ready to create a batch of these irresistible no-bake wonders. Your taste buds (and your schedule!) will thank you!
