Master No-Bake Oreo Truffles: Your Ultimate Guide to Flavor and Freezing
Imagine a delightful treat that captures the essence of a birthday cake, yet requires no oven, no complex techniques, and minimal effort. Enter the magical world of
oreo birthday cake truffles no bake! These irresistibly fudgy and vibrant bites are a celebration in themselves, perfect for any occasion, from impromptu sweet cravings to elaborate parties. Forget the stress of baking; these truffles deliver maximum flavor with minimum fuss, making them a true game-changer in your dessert repertoire.
The Irresistible Allure of No-Bake Oreo Truffles
What makes these sprinkle-laden delights so universally adored? It's their perfect combination of simplicity, speed, and undeniable deliciousness. No-bake desserts have gained immense popularity for a reason – they’re accessible to everyone, regardless of baking experience. These Oreo truffles embody that spirit, transforming humble cookies into a sophisticated, celebratory confection.
Simplicity Meets Indulgence: The No-Bake Advantage
The beauty of creating
oreo birthday cake truffles no bake lies in their straightforward process. You skip the flour, eggs, and leavening agents, and go straight for the good stuff: crushed Oreos, a rich binding agent, and a generous shower of sprinkles. This approach not only saves time but also ensures a consistently moist and dense texture that’s incredibly satisfying. It's an ideal recipe for engaging kids in the kitchen or for whipping up a last-minute dessert when unexpected guests arrive. For more stress-free dessert ideas, check out our guide on
Easy No-Bake Birthday Cake Oreo Truffles: A Stress-Free Treat.
Core Ingredients: A Symphony of Sweetness
At their heart, these truffles are a brilliant fusion of just a few key components. While variations exist, the foundational elements typically include:
*
Oreos: The star of the show! Whether you choose classic chocolate, Golden Oreos, or even specialty Birthday Cake Oreos, they provide the essential cookie base and flavor.
*
Binding Agent: This is where delightful variations come in. Common choices include a mixture of melted white chocolate and condensed milk for a super fudgy consistency, or softened cream cheese for a richer, tangier profile.
*
Sprinkles: Non-negotiable for that festive "birthday cake" aesthetic and a playful crunch. Rainbow sprinkles are a must!
*
Optional Coatings: Melted chocolate or candy wafers for dipping add an extra layer of decadence and visual appeal.
Crafting Your Perfect Batch: Step-by-Step Guide to Oreo Birthday Cake Truffles
Making these truffles is less about following rigid rules and more about embracing a creative, hands-on process. Here are two popular methods to achieve your perfect no-bake treat.
Method 1: The Fudgy Square (Condensed Milk & White Chocolate)
This method yields dense, moist squares that are incredibly rich and satisfying.
1.
Crush Your Oreos: Begin by placing your chosen Oreos (creme filling and all!) into a food processor. Pulse until fine crumbs form. Depending on your processor size, you might need to do this in batches. The goal is a uniform, sand-like texture. Pour these crumbs into a large mixing bowl.
2.
Prepare the Sweet Binding: In a microwave-safe bowl, melt your white chocolate chips in short bursts (30 seconds at a time), stirring well after each interval, until smooth and completely melted. Be careful not to overheat!
3.
Combine and Create: Pour the condensed milk into the melted white chocolate and stir until thoroughly combined. This creates a wonderfully smooth and sweet mixture. Now, add a generous amount of rainbow sprinkles to this mixture and stir them in.
4.
Mix with Oreos: Pour the wet mixture into the bowl with the crushed Oreos. Using a sturdy spatula or your hands, mix until everything is fully incorporated and you have a thick, uniform dough.
5.
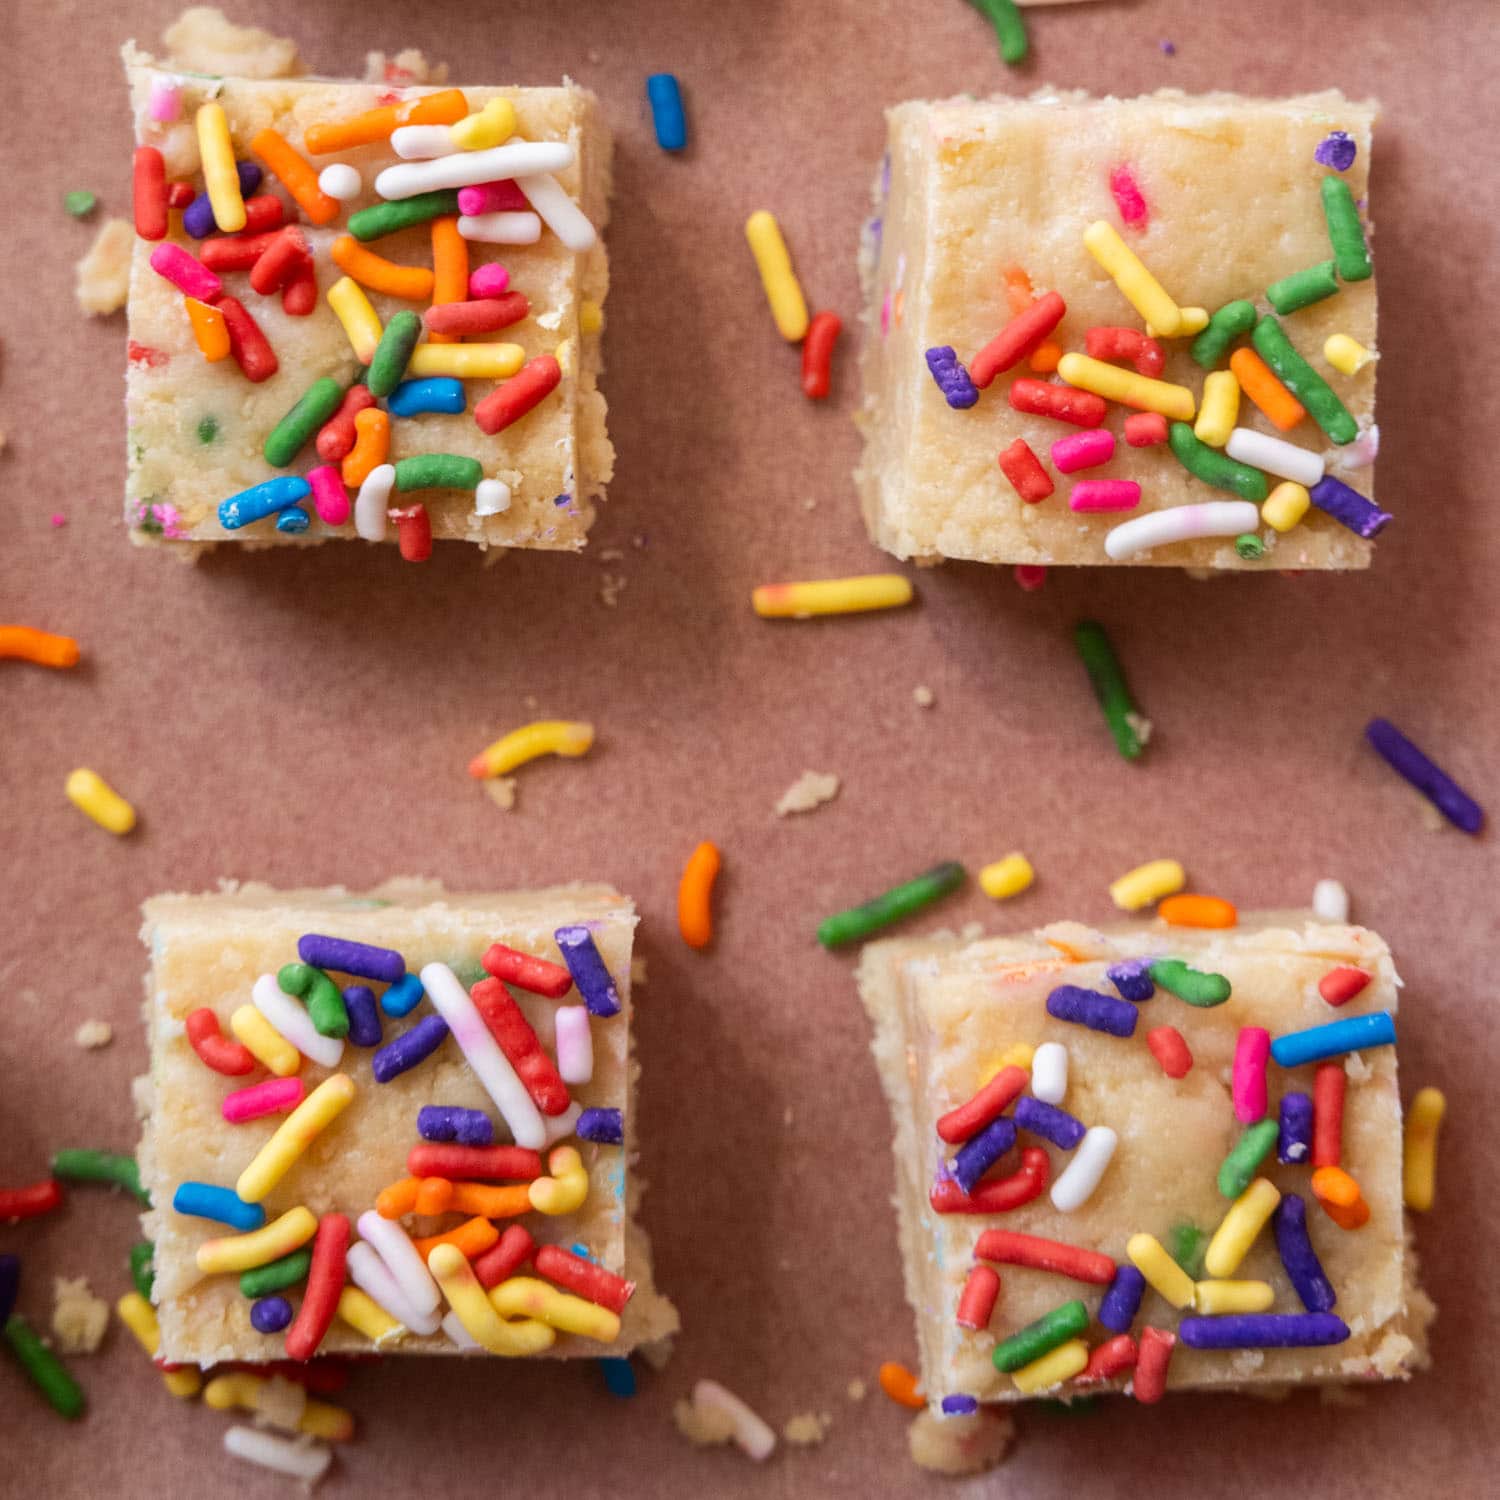
Press and Chill: Line a baking pan (a standard 8x8 or 9x9 inch pan works well) with parchment paper, leaving an overhang to easily lift the finished truffles. Press the Oreo mixture firmly and evenly into the pan, using the spatula to smooth the top.
6.
Sprinkle and Set: Shower the top with more rainbow sprinkles, gently patting them down so they adhere to the mixture. Place the pan in the refrigerator to chill for at least 2 hours, or until completely firm.
7.
Cut and Serve: Once firm, remove the pan from the refrigerator, lift the slab out using the parchment paper, and cut into small, bite-sized squares.
Method 2: The Creamy Ball (Cream Cheese Infusion)
This approach results in a slightly tangier, creamier truffle, often rolled into individual balls and dipped.
1.
Oreo Crumb Base: Process your Oreos (Golden or Birthday Cake Oreos are fantastic here!) into fine crumbs, just like in Method 1. Transfer to a mixing bowl.
2.
Add Softened Cream Cheese: Add softened cream cheese (Philadelphia is a popular choice) to the Oreo crumbs. Softening the cream cheese is crucial for a smooth mixture.
3.
Pulse and Fold: If using a food processor, pulse until well combined and smooth. If mixing by hand, use a sturdy spoon or spatula to thoroughly blend the cream cheese into the Oreo crumbs until a cohesive "dough" forms.
4.
Sprinkle Magic: Gently fold in your rainbow sprinkles with a spatula.
5.
Roll and Chill: Scoop out small, tablespoon-sized portions and roll them between your palms into uniform balls. Place these balls on a parchment-lined baking sheet.
6.
Optional Dipping: For an extra special touch, chill the balls for at least 30 minutes. Then, melt white chocolate melts or birthday cake flavored candy wafers (as mentioned in the reference context, these add an "extra birthday-y" touch!). Dip each chilled truffle ball into the melted coating, tapping off any excess, and immediately adorn with more sprinkles before the coating sets. Place back on parchment paper to fully harden.
For more on the delightful Golden Oreo Truffles, check out
Fudgy Golden Oreo Truffles: Your Ultimate No-Bake Birthday Bite.
Flavor Fiesta: Beyond the Classic Birthday Cake
While
oreo birthday cake truffles no bake are a star, the beauty of this recipe is its adaptability. You can easily tweak the flavors to suit any palate or occasion.
*
Classic Oreo Truffles: Use regular chocolate Oreos for a rich, dark chocolate and cream flavor profile that mimics a chocolate cake.
*
Golden Oreo Truffles: As highlighted, Golden Oreos provide a vanilla or "yellow cake" base, making them perfect for a traditional birthday cake feel, especially when paired with white chocolate and sprinkles.
*
Birthday Cake Oreos: If you can find them, these specialty Oreos are a shortcut to intensified birthday cake flavor, often already containing colorful sprinkles within the cookie itself!
*
Seasonal Variations: Think pumpkin spice Oreos for autumn, peppermint Oreos for winter, or lemon Oreos for spring.
*
Dipping and Decorating:
*
White Chocolate: A classic pairing, especially with Golden or Birthday Cake Oreos.
*
Dark or Milk Chocolate: Great for classic chocolate Oreo truffles.
*
Colored Candy Melts: Available in every color of the rainbow, these allow for vibrant, themed truffles. You can even add a touch of vegetable oil to thin them slightly for easier dipping.
*
Toppings Galore: Beyond sprinkles, consider mini chocolate chips, edible glitter, finely chopped nuts (if not going for a pure "birthday cake" theme), or even a drizzle of contrasting chocolate.
Mastering the Art of Freezing: Enjoying Truffles Anytime
One of the greatest advantages of
oreo birthday cake truffles no bake is their freezer-friendly nature. This allows you to prepare them in advance, always have a sweet treat on hand, and enjoy them for months to come.
Why Freeze Your Truffles? Convenience and Longevity
Freezing truffles is a brilliant hack for meal prepping desserts.
*
Batch Cooking: Make a large batch and store them, ready for whenever a craving strikes or an unexpected guest drops by.
*
Extended Shelf Life: While refrigerated truffles last about a week, frozen truffles can maintain their quality for 2-3 months.
*
Portion Control: Freezing individual truffles makes it easy to grab just one or two, preventing overindulgence.
Best Practices for Freezing and Thawing
1.
Cut and Arrange: After cutting your truffles into bite-sized squares or forming them into balls, place them in a single layer on a parchment-lined baking sheet. Flash freeze them for about 30 minutes to an hour until firm. This prevents them from sticking together.
2.
Store Properly: Once flash-frozen, transfer the truffles to an airtight freezer bag or container. If layering, place parchment paper between each layer to prevent sticking. Label with the date.
3.
Thawing for Optimal Enjoyment: When you're ready to indulge, simply remove the desired number of truffles from the freezer. You can let them sit at room temperature for a few minutes to soften slightly, or surprisingly, enjoy them straight from the freezer! They have a delightful, slightly chewy texture when frozen and soften quickly as you nibble.
Conclusion
No-bake Oreo truffles, especially the vibrant "birthday cake" variety, are more than just a dessert; they're a testament to how simple ingredients can create extraordinary joy. Whether you opt for the fudgy squares with condensed milk or the creamy balls with cream cheese, these easy-to-make, freezer-friendly treats are guaranteed to bring smiles. So, gather your Oreos, unleash your inner pastry chef (without turning on the oven!), and master the art of these delightful
oreo birthday cake truffles no bake – your sweet tooth will thank you!